The following is a set-up guide for CIRA Canadian Shield for the Android (non-app) option. See all the set-up guides for Canadian Shield.
Before you proceed…
- If you set-up CIRA Canadian Shield on your router/gateway then the whole network is protected and you will not need to set-up individual devices.
- It’s free! But please still take the time to review and understand the terms and conditions and privacy policy privacy policy.
- Before changing your DNS settings write down your existing IP addresses in case you need to go back. Go to the bottom of this page to see if you have configured it correctly.
Once you are done, you can go here to test your configuration.
A summary of DNS resolver addresses can be found here.
Instructions:
If you use this operating system then you probably know what you are doing already. For most Linux distributions, configure DNS settings through Network Connections Manager.
1. Click on the Network icon (top-right panel by default).
2. Click on Edit Connections to open the Network Connections.
3. Select and highlight your connection name.
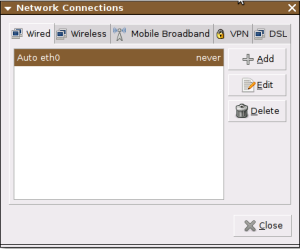
4. Click Edit.
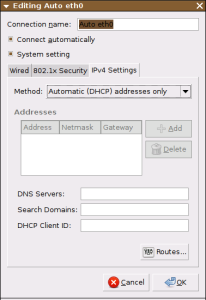
5. Click on the IPv4 Settings tab or the IPv6 Settings tab.
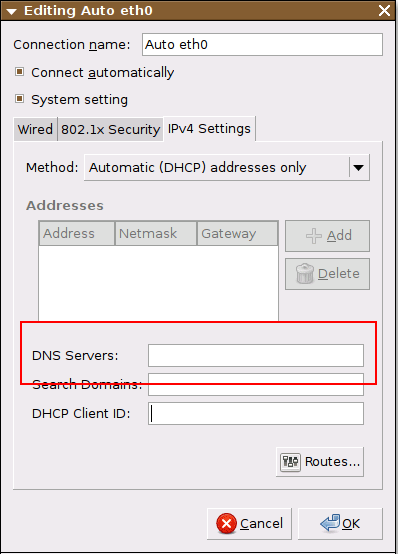
6. In the DNS servers field, enter the Canadian Shield IP addresses. Be sure to separate the IP addresses with a comma.
a. For Private, add the following:
i. For IPv4, enter: 149.112.121.10 and 149.112.122.10
ii. For IPv6, enter: 2620:10A:80BB::10 and 2620:10A:80BC::10
b. For Protected, add the following:
i. For IPv4, enter: 149.112.121.20 and 149.112.122.20
ii. For IPv6, enter: 2620:10A:80BB::20 and 2620:10A:80BC::20
c. For Family, add the following:
i. For IPv4, enter: 149.112.121.30 and 149.112.122.30
ii. For IPv6, enter: 2620:10A:80BB::30 and 2620:10A:80BC::30
7. Click Save.
You are ready to go – your device is now using CIRA Canadian Shield.