The following is a set-up guide for CIRA Canadian Shield for the Android (non-app) option. See all the set-up guides for Canadian Shield.
Before you proceed…
- If you set-up CIRA Canadian Shield on your router/gateway then the whole network is protected and you will not need to set-up individual devices.
- It’s free! But please still take the time to review and understand the terms and conditions and privacy policy privacy policy.
- Before changing your DNS settings write down your existing IP addresses in case you need to go back. Go to the bottom of this page to see if you have configured it correctly.
Once you are done, you can go here to test your configuration.
A summary of DNS resolver addresses can be found here.
Instructions:
For the Nintendo Switch, configure DNS settings in the Internet Settings menu.
- Navigate to the home screen and select the System Settings button at the bottom of the screen.
- Select Internet Settings> Internet Settings.
Your Nintendo Switch will automatically search for nearby WiFi signals. - Select your network from the list of networks located under Registered Networks.
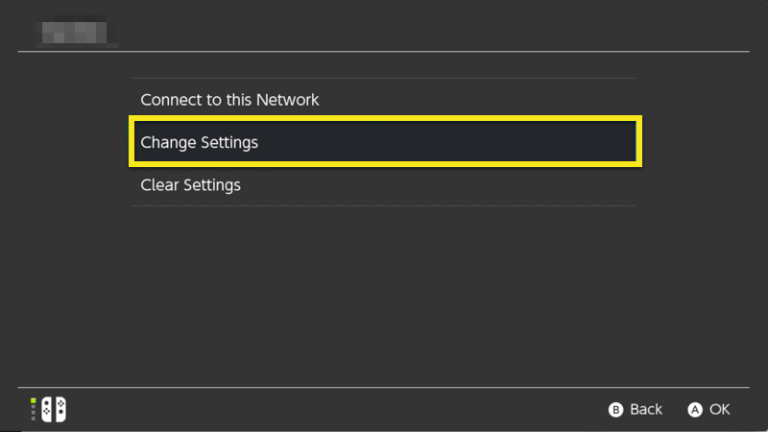
- Select Change Settings.
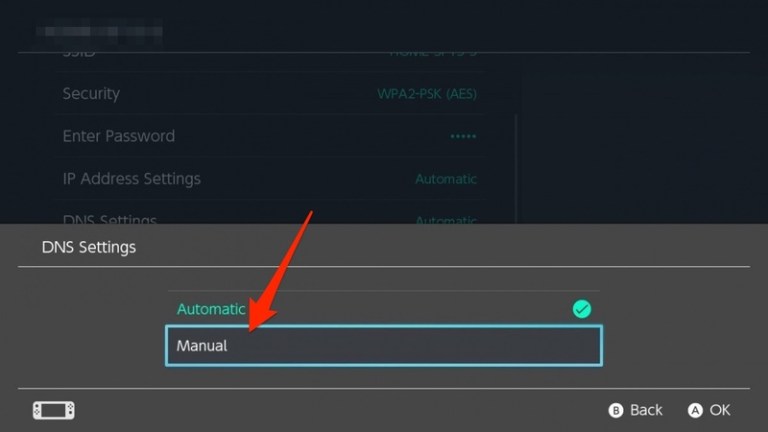
- Select Manual under DNS Settings.
- Select Primary DNS and hold down the B button to delete the existing DNS address.
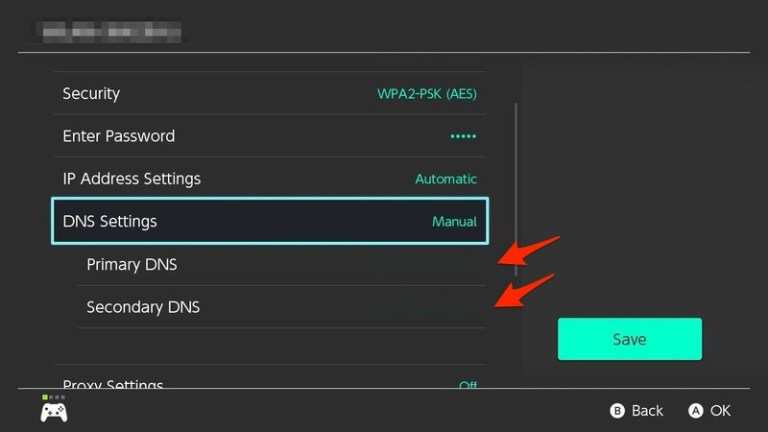
- Set the Primary DNS to:
- For Private: 149.112.121.10
- For Protected: 149.112.121.20
- For Family: 149.112.121.30
- Select Secondary DNS and hold down the B button to delete the existing DNS address.
- Set the Secondary DNS to:
- For Private: 149.112.122.10
- For Protected: 149.112.122.20
- For Family: 149.112.122.30
- Click OK.
You are ready to go – your Nintendo Switch is now using CIRA Canadian Shield.